Site Settings
Site settings will guide you through configuring essential aspects of your store, including branding, localisation, domain management, and email setup. These settings ensure a smooth and customised shopping experience for your customers.
Access your Site Settings:
- Log in to your website.
- Navigate to Settings from the left menu.
- Select Site Settings to begin configuration.
Branding Your Store
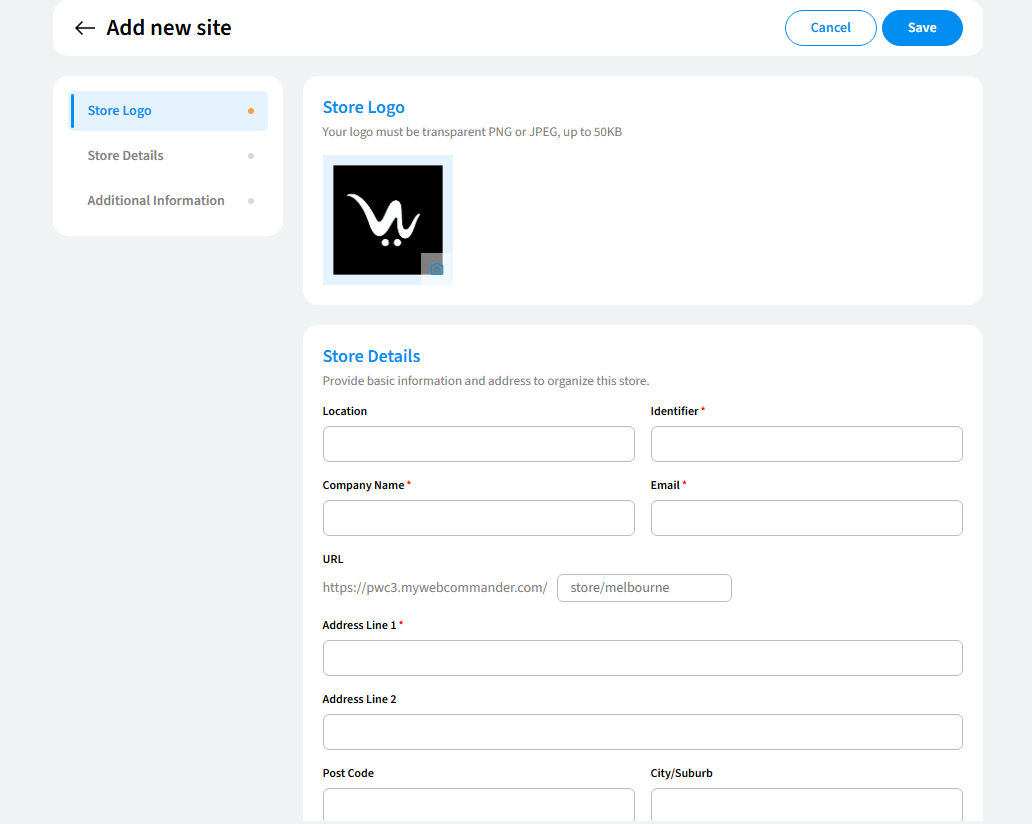
Store Logo
-1.png)
You can upload your store's logo to personalise your site and enhance your brand identity. The supported file formats for the logo are JPEG, PNG, and JPG. The maximum file size allowed is 50KB.
Favicon
-2.png)
You can upload a small icon that will appear on browser tabs to help users easily recognise your store. The supported file formats for the favicon are JPEG, PNG, and JPG. The recommended size is 512 pixels, and the maximum file size allowed is 10KB.
Store Contact Details
You can add key information about your store to build trust with your customers and ensure smooth communication.
-1.png)
Fields to fill:
- Company name: You have to enter your official business name.
- Email: You have to provide a valid email address for customer communication.
- Address line 1: You have to enter your primary business address.
- Address line 2: You have to add additional address details if needed.
- Post code: This field will update automatically based on the selected country and state.
- Suburb/city: You have to input the city name (e.g., "Acton Park").
- State and country: You have to select the appropriate options from the dropdown menus.
- Phone, mobile, fax: You have to provide the contact numbers for your business.
- ABN: You have to enter your Australian Business Number if applicable.
Date & Time Settings
You can customise how dates and times appear on your website and in emails.
-1.png)
What you can set:
- Date format: You can choose options like "1/21/2001" or "Monday, January 01, 2001."
- Time format: You can pick formats such as "9:04 AM" or "23:04:05."
- First day of the week: You can select Sunday, Monday, or any other day.
- Time zone: You can choose from global options like "GMT+10:00" or "AEST."
- Separate settings for email/user: You can configure unique date and time formats for emails or users.
- Hide time zone: You can simplify displays by hiding the time zone.
Administration Settings
You can take control of essential backend configurations to manage your store efficiently.
-1.png)
Error pages
- 404 page: You can choose a message for missing pages (e.g., "Page Not Found").
- 403 page: You can select a message for restricted content (e.g., "Access Denied").
Precision and measurement
- Price precision: You can choose the number of decimal places for pricing (1-9 digits).
- Unit of length: You can select options like centimeters or miles.
- Unit of mass: You can choose options like grams or kilograms.
Enable/disable features
- Turn off online store: You can temporarily disable your eCommerce site.
Captcha security
- Enable site CAPTCHA: You can turn it on from the admin panel for extra protection.
- Choose reCAPTCHA version: You can select either v2 or v3 in the dropdown based on your security needs.
- v2: Uses visual challenges to verify human users before allowing access.
- v3: Works in the background to detect suspicious activity without interrupting the user experience.
For setting up CAPTCHA, key follow this document.
Multi-site mode
Multi-site support lets you manage multiple websites from one admin panel. You can link sites to specific locations, and users can easily switch between them using a dropdown menu. This is perfect for businesses with multiple stores, simplifying operations and keeping everything in one place.
.png)
Make data entry easier with auto-complete options:
- Auto-suggest address/suburb: This is enabled after entering a valid post code.
Domain Settings
You can manage how your website behaves and appears.
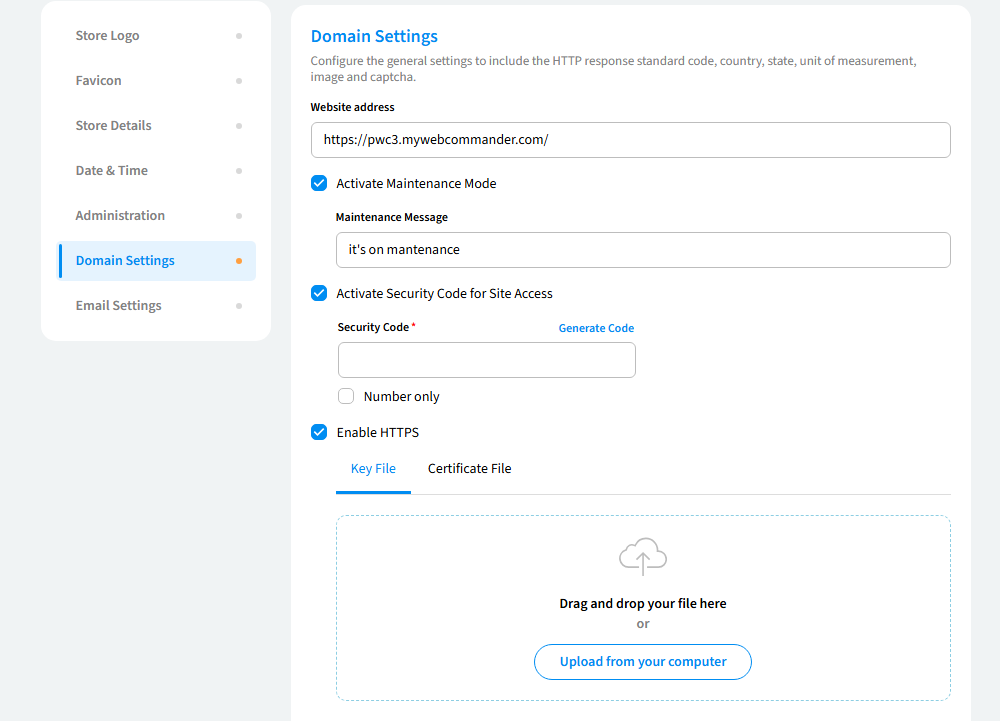
Key features:
- Website address: You can input the URL of your store.
- Maintenance mode: Temporarily disable your website while you perform updates. Visitors will see a custom message instead of the site’s content.
- Security code: Set a custom password to add an extra layer of protection. Only authorized users with the correct code can access the site.
- Enable HTTPS: HTTPS keeps your information secure by encrypting it, protecting things like passwords and payment details.
- Domain alias: Use different domain names to point to the same site, protecting your brand and improving search engine rankings.
Email Configuration
You can set up email services for communication and notifications.
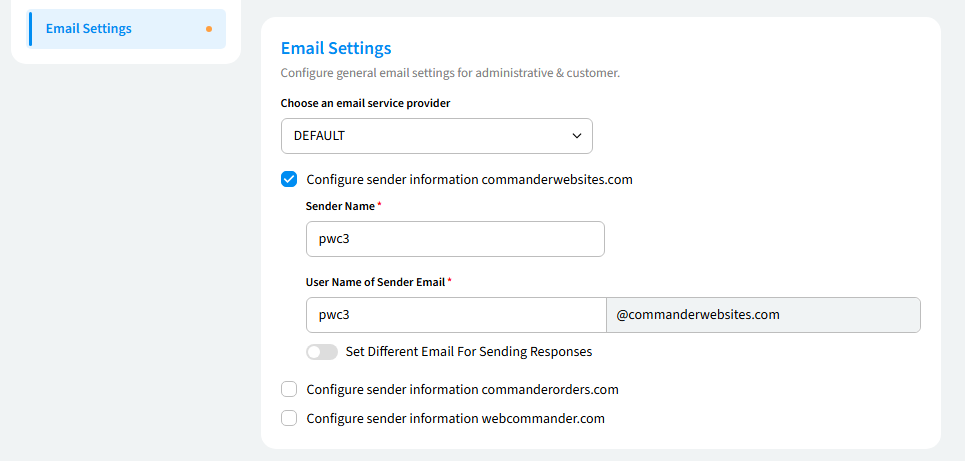
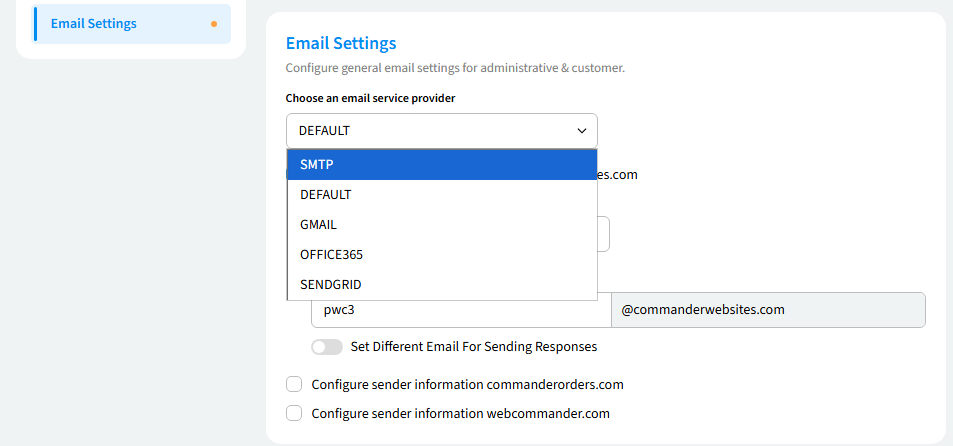
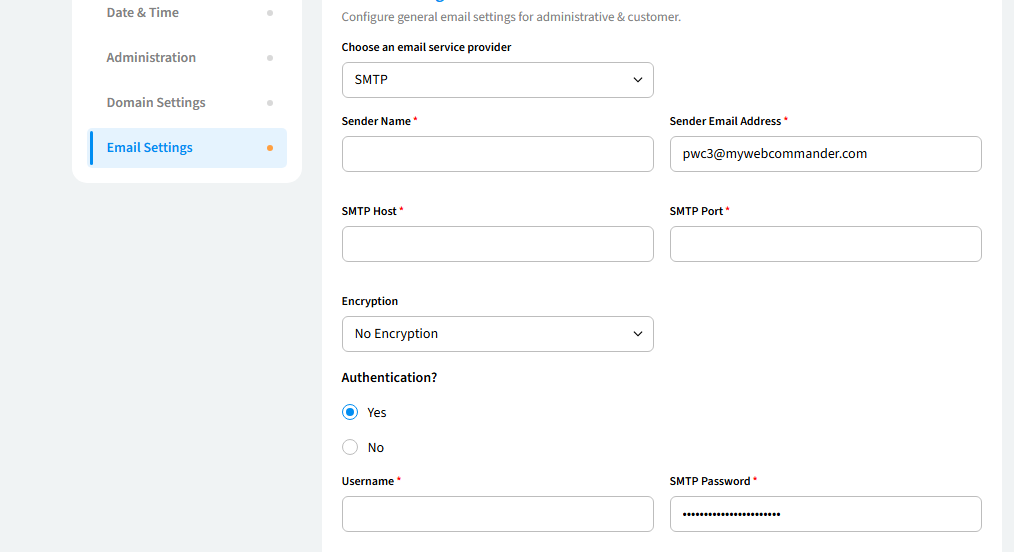
Available providers
- Gmail
- Office365
- SMTP
- SendGrid
- Default
What you can configure
- Sender name & email (required): You can define who emails come from.
- SMTP settings: You can add host, port, encryption, and authentication details.
- Reply-to email: You can specify a separate address for responses.
Troubleshooting Guide
Store Logo Not Uploading
- Ensure the image is in JPEG, PNG, or JPG format and compress it to reduce the file size below 50KB.
Incorrect Store Contact Details Displayed
- Double-check and save the details again, then clear the browser cache and try again.
Date & Time Not Displaying Correctly
- Verify and update the time zone in site settings, then refresh or clear the browser cache.
CAPTCHA Not Working
- Obtain valid reCAPTCHA keys from Google and switch between reCAPTCHA v2 and v3.
Maintenance Mode Not Turning Off
- Disable Maintenance Mode in Domain Settings and clear the cache to refresh the page.
Email Not Sending
- Check SMTP settings (host, port, encryption) and try using a different email provider.
Multi-Site Dropdown Not Showing
- Enable multi-site mode in Administration Settings and ensure sites are linked to store locations.
Domain Alias Not Redirecting
- Reconfigure the domain alias in Domain Settings and wait for DNS propagation (up to 48 hours).
If issues persist, contact support for further help.