Managing Product Variations
Product variations let you offer different options of the same product — such as sizes, colours, or styles — so customers can choose the option they want before adding a product to their cart.
Variations are created and managed from the Product Variation tab in the Products section of your WebCommander admin. Once a variation type is created here, it becomes available to assign to individual products. For more information on assigning variations to a product, see Product Details page.
Add a new variation
A variation consists of a name (for example, "Pick Size") and a set of options (for example, S, M, and L). Once created, it can be assigned to any product in your store.
Steps:
1. From your WebCommander admin, click Products in the left sidebar.
2. Click the Product Variation tab.
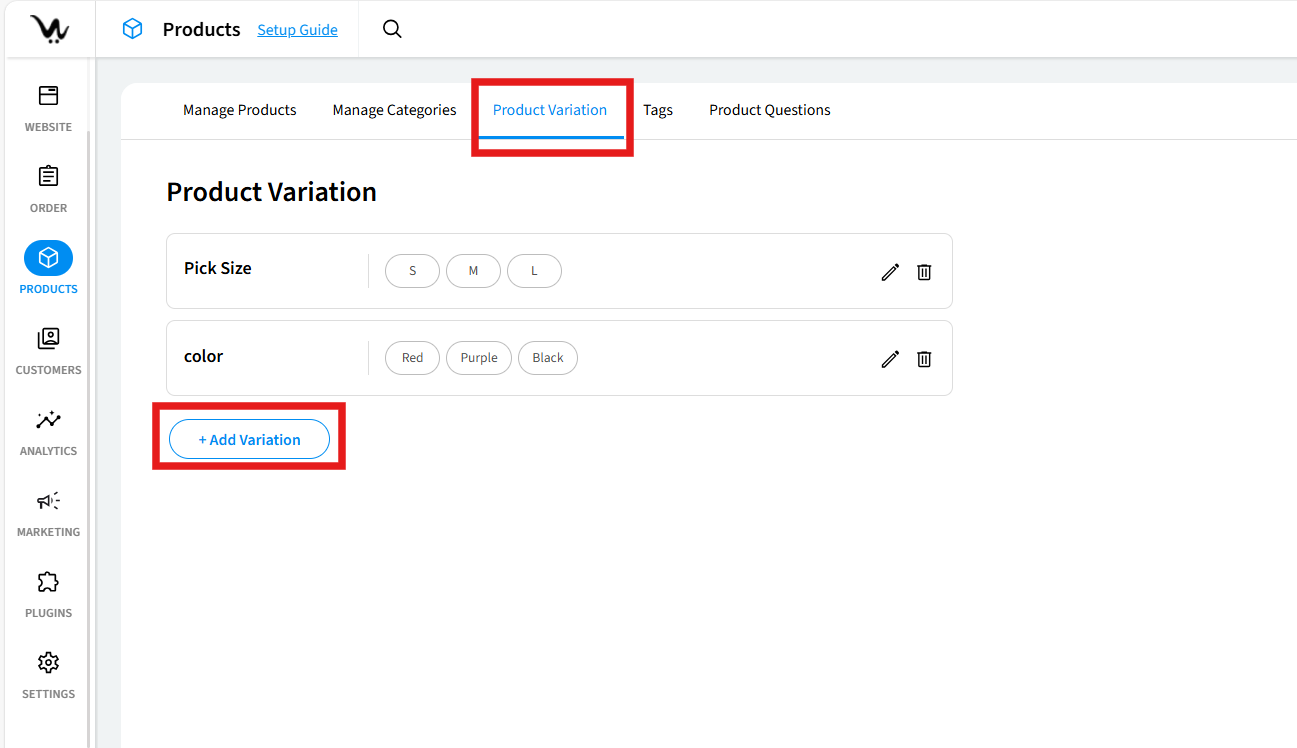
3. Click + Add Variation.
4. In the Add Variation form, enter a name in the Variation Name field. This is the internal name used to identify this variation type (for example, "Pick Size" or "Colour").
5. The Standard field is set to Text by default. Leave this as is unless you need to change the input format.
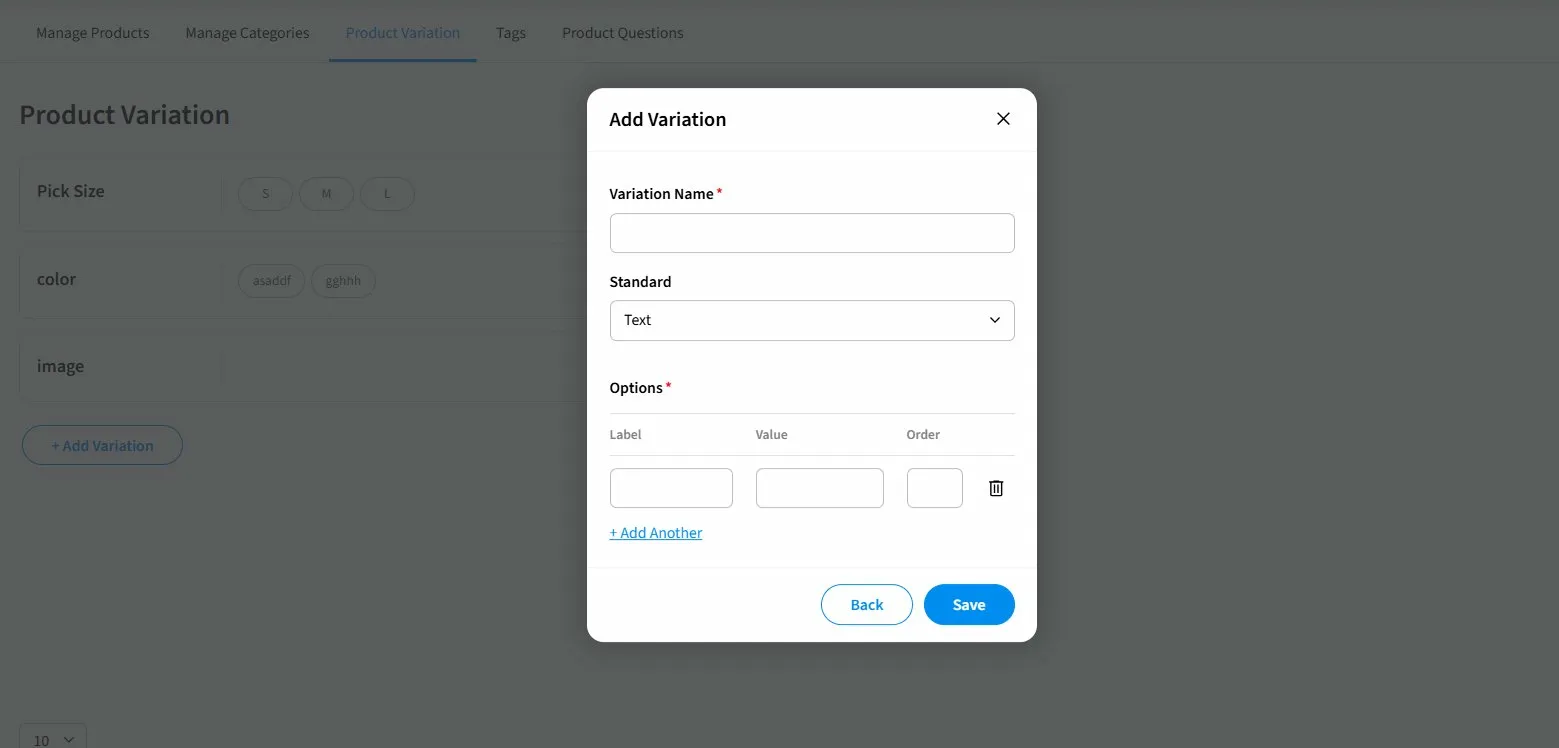
6. Under Options, enter a Label, Value, and Order for each option. The Label is what customers see on the storefront, the Value is the internal identifier, and the Order controls the display sequence.
7. Click + Add Another to add more options as needed.
8. Click Save.
Tip: Keep your option Labels short and clear — for example, "S", "M", "L" for sizes, or "Red", "Blue", "Green" for colours — as these are displayed directly to customers on the product page.
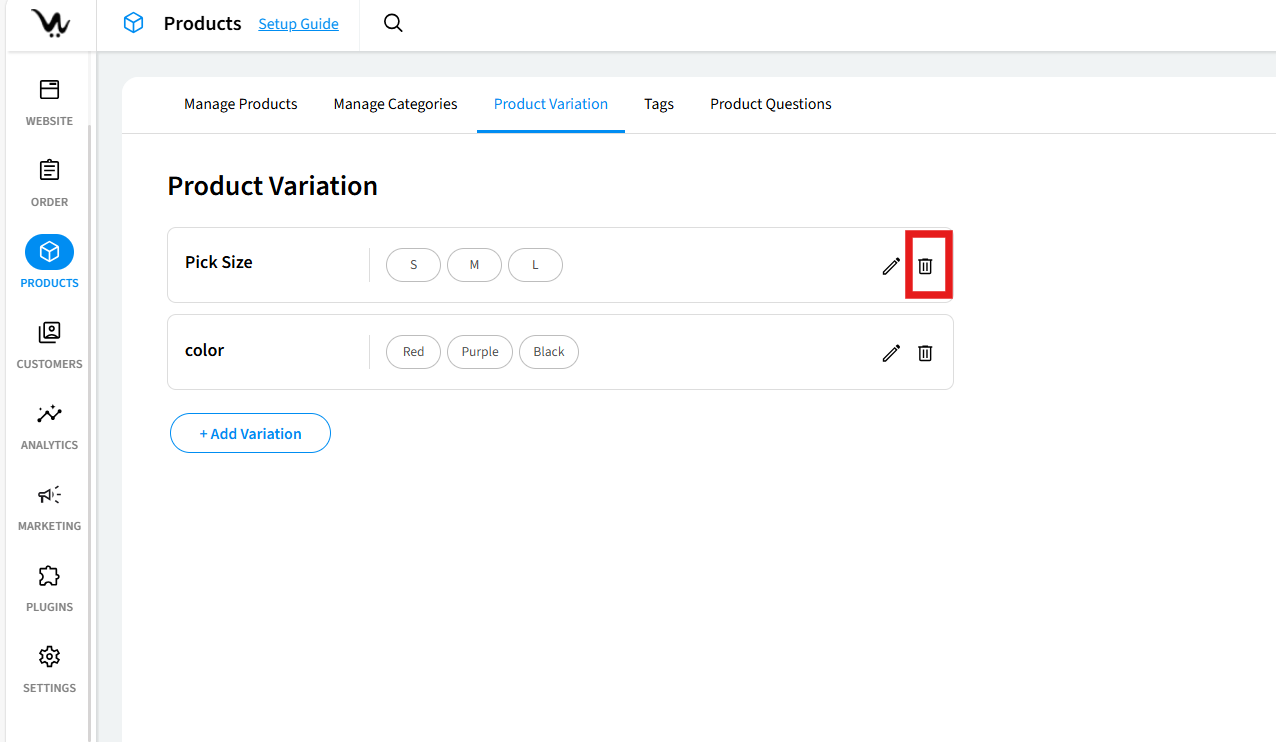
What you'll see: The new variation appears in the Product Variation list, showing its name and all its options as pill-shaped labels. It is now available to assign to products.
Edit a variation
You can update a variation's name or any of its options at any time. Changes will be reflected on any products the variation is assigned to.
Steps:
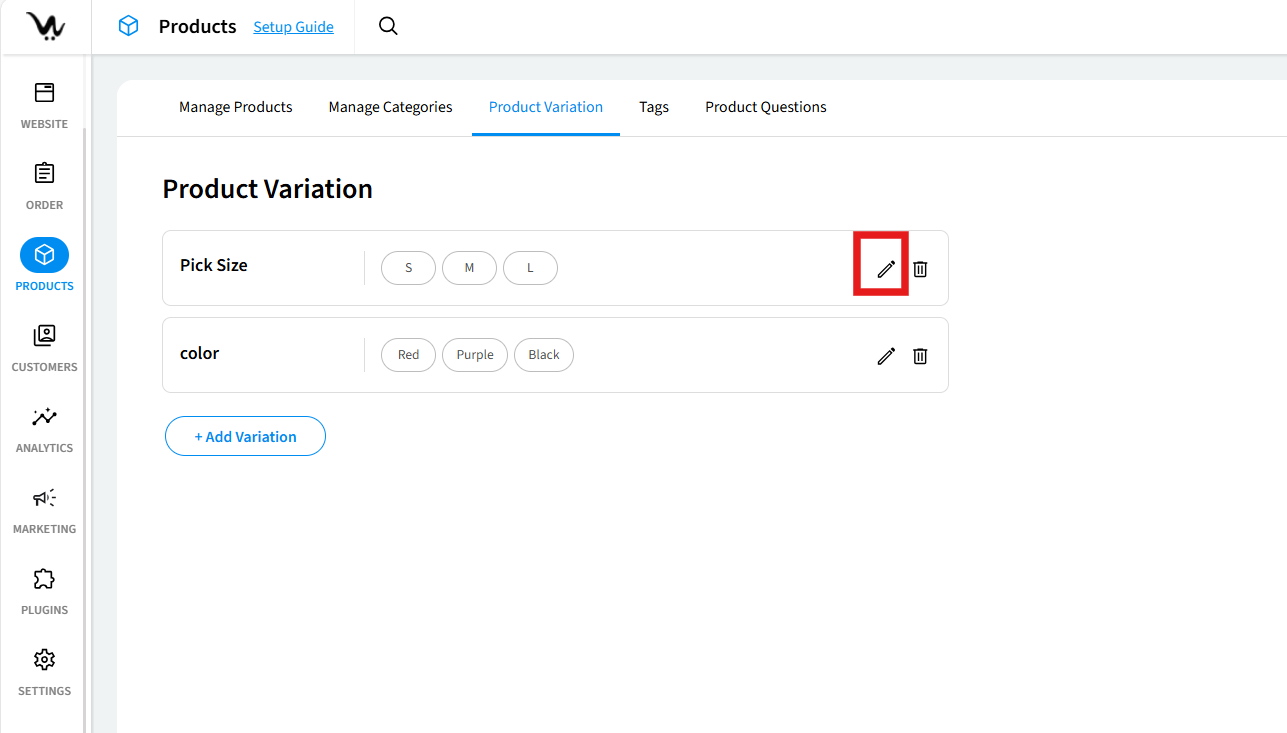
1. In the Product Variation tab, find the variation you want to update and click the pencil icon on the right side of its row.
2. In the Edit Variation form, make your changes to the Variation Name or any of the Options.
3. Click + Add Another to add new options or click the trash icon next to an option to remove it.
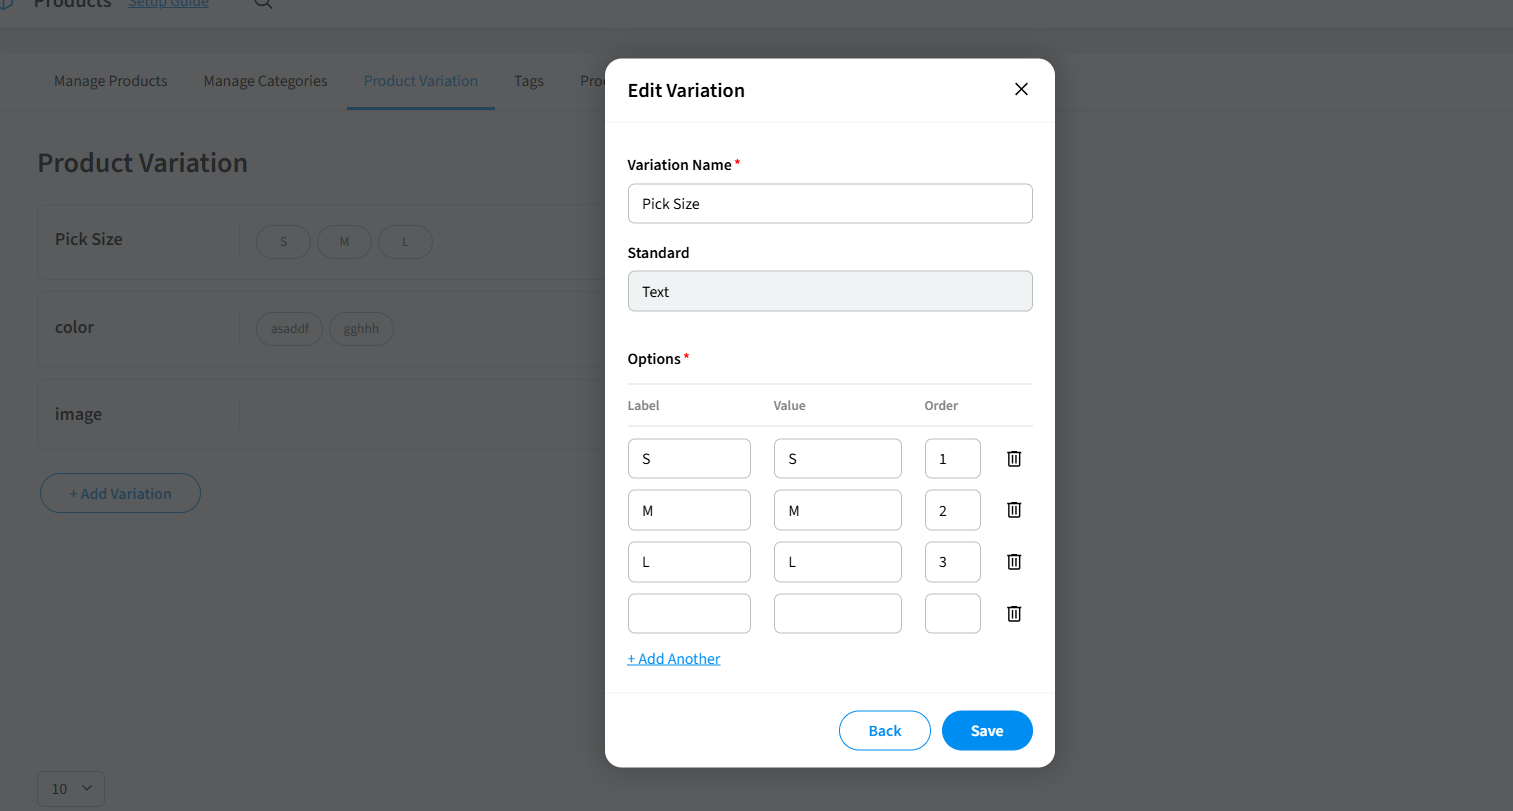
4. Click Save.
What you'll see: The variation is updated in the list and your changes are immediately reflected on all products it is assigned to.
Delete a variation
Deleting a variation permanently removes it from your store.
Warning: Deleting a variation type removes it from all products it has been assigned to. Make sure you no longer need it before proceeding.
Steps:
1. In the Product Variation tab, find the variation you want to delete and click the trash (🗑️) icon on the right side of its row.
2. In the Remove Variation confirmation dialog, click Yes, remove to confirm, or No, keep it to cancel.
What you'll see: The variation is immediately removed from the Product Variation list.