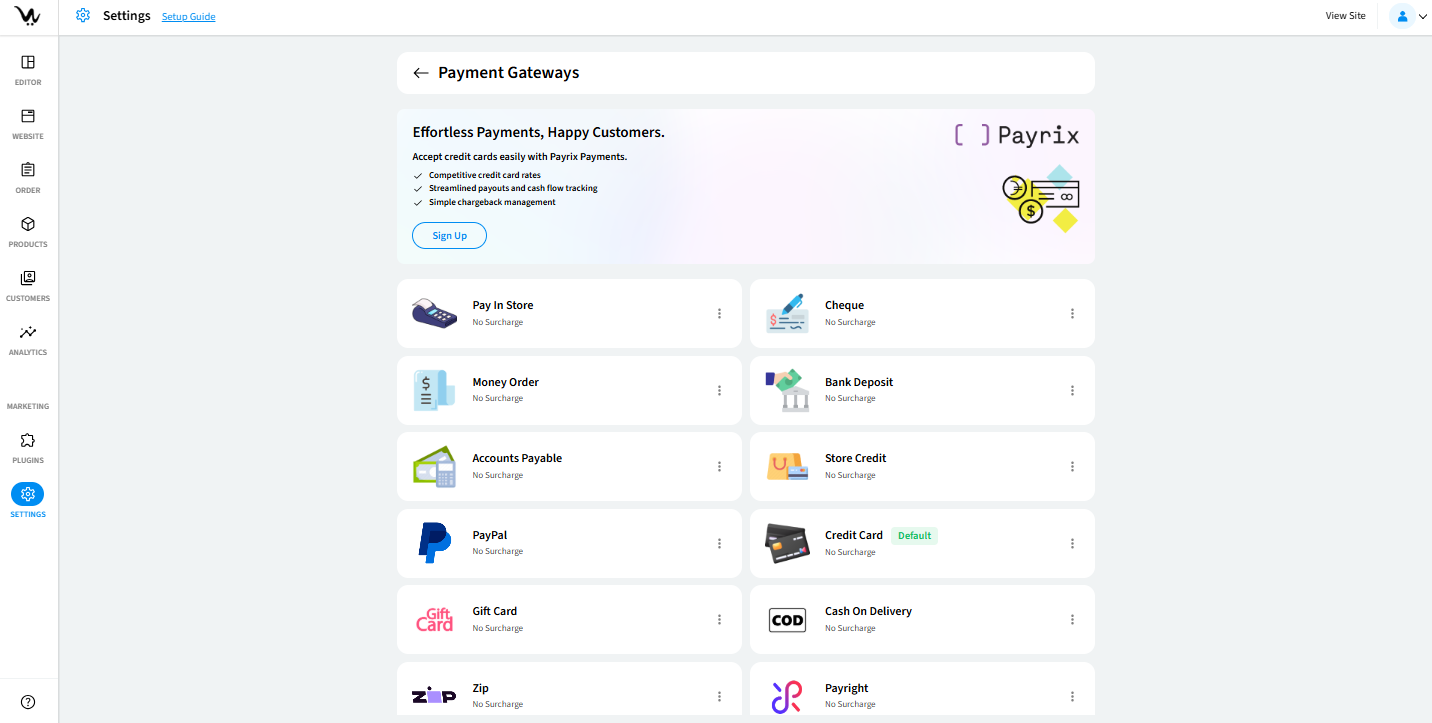
Payment Gateways
The Payment Gateway feature enables secure, real-time processing of customer payments during checkout. It acts as a bridge between the online store and financial institutions, facilitating various payment methods such as credit/debit cards, digital wallets, bank transfers, and offline options like money orders or cash on delivery.
By offering multiple gateways and flexible configurations, this feature improves conversion rates, enhances user trust, and supports smooth transaction flows. Integrated fraud protection, zone-based availability, and visibility settings ensure safe, personalised, and efficient payment experiences for both you and your customers.
Accessing Payment Gateway Settings
- Login to your WebCommander account.
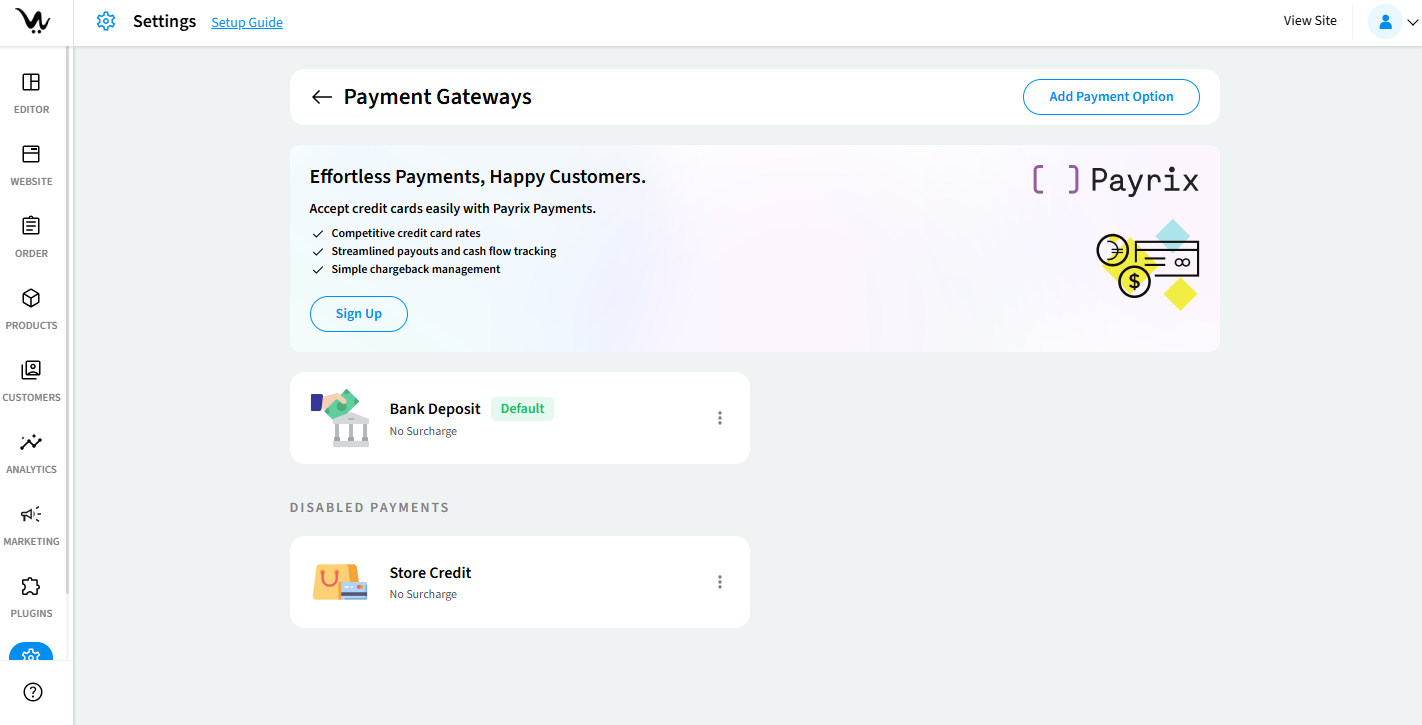
- Navigate to Settings from the left menu.
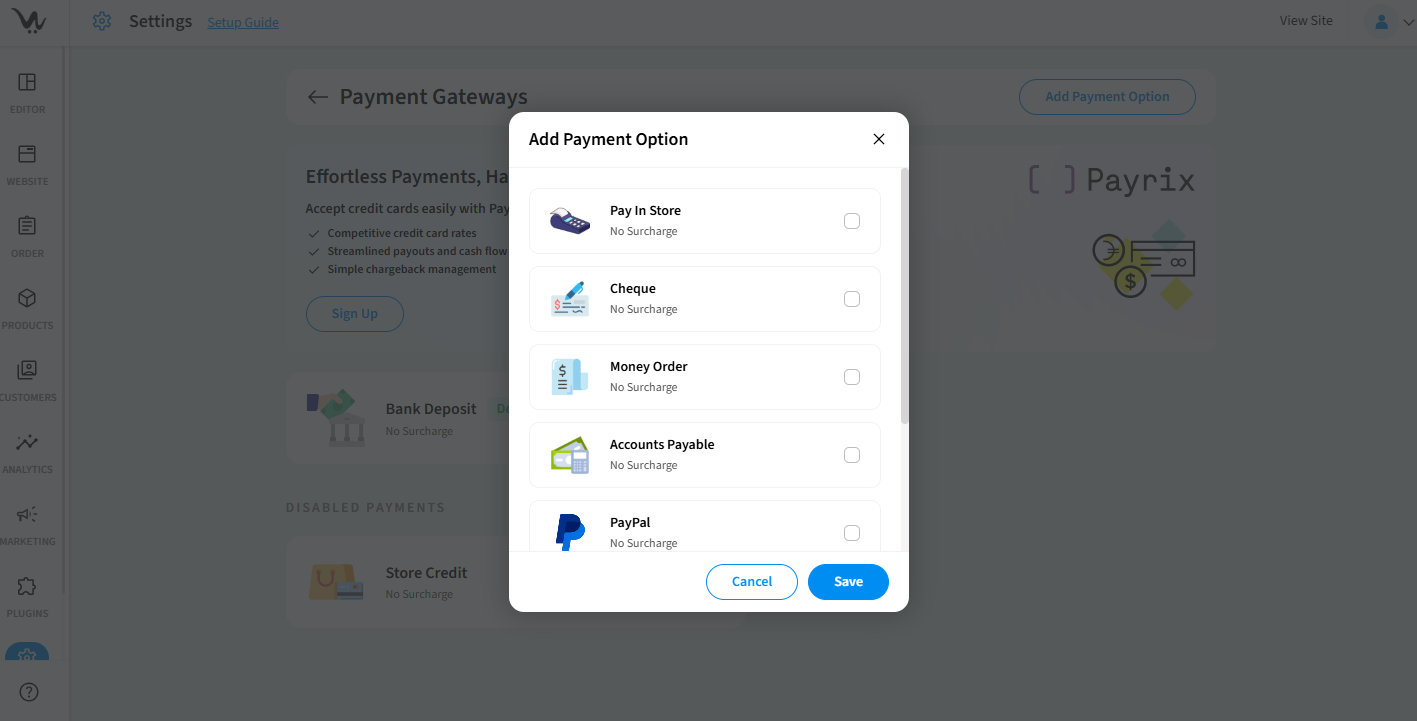
- Click on Payment Gateway, then click Add Payment Option.
How to configure Payment Gateway
Add the payment option if it's not in the list already. Then, you can enable and configure individual payment options.
The following fields will help you configure Pay in Store, Money Order, Accounts Payable, Cheque, Store Credit, Bank Deposit and Cash on Delivery payment gateways.
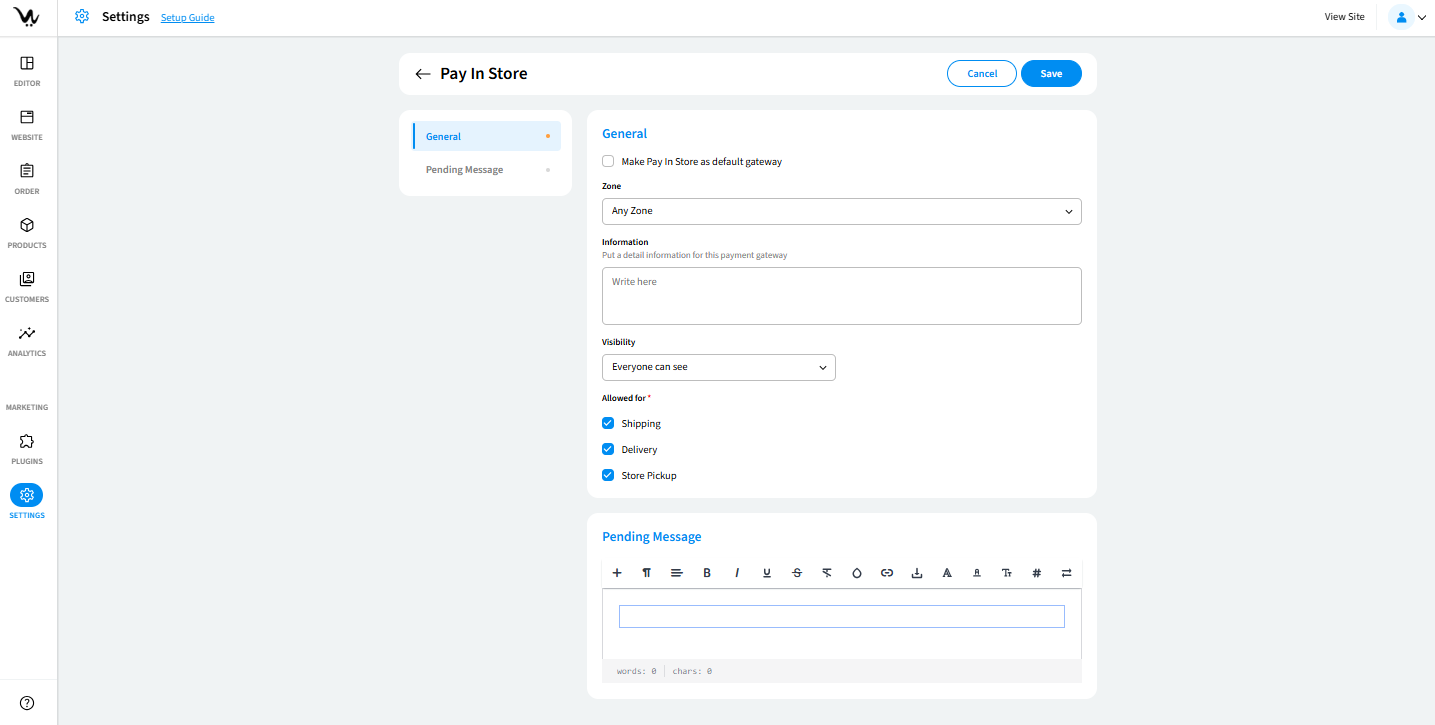
- Make default gateway: setting as Default Gateway allows you to set it as the default payment option. All payments will default to the method unless changed.
- Zone: In the Zone dropdown, select a specific zone or leave as Any Zone. Click Save. Only customers within the selected zone(s) will be able to use this payment method.
- Information: add internal or customer-facing notes such as bank account details, payment instructions, or terms.
- Visibility: who can view and use the Bank Deposit method. Helps target the payment method to intended user groups.
Everyone can see
Only selected customers
Only users placing an order
- Allowed for: configure when Bank Deposit is available based on delivery types. Select Allowed Delivery Options (e.g., Home Delivery, In-store Pickup) and save changes. Payment method appears only for allowed delivery methods.
- Pending Payment Message: Customize the message shown while the payment is pending. Example: "Your payment is being processed. Please wait for confirmation."
How to configure Credit Cards
The Credit Card payment gateway allows customers to pay directly using their Visa, MasterCard, AMEX, or other supported cards during checkout. It offers fast, secure, and widely accepted transaction processing, making it one of the most essential payment methods for any eCommerce site.
Available credit card processors in WebCommander are SecurePay, Stripe, eway, ePath, Nab, Zip, Square, Braintree, Fatzebra, and Payrix.
To configure credit cards, click here.
How to configure Express Checkout
The Express Checkout payment gateway streamlines the checkout process by allowing customers to complete their purchases with minimal steps. It integrates directly with digital wallets or payment providers (e.g., PayPal Express), bypassing lengthy form inputs and enhancing user convenience.
In WebCommander we offer PayPal, Afterpay, Google Pay and Apple Pay as our express checkout options.
To configure express checkout, click here.
How to configure Payright
You need api key, if you don't have it then follow the instructions from here.
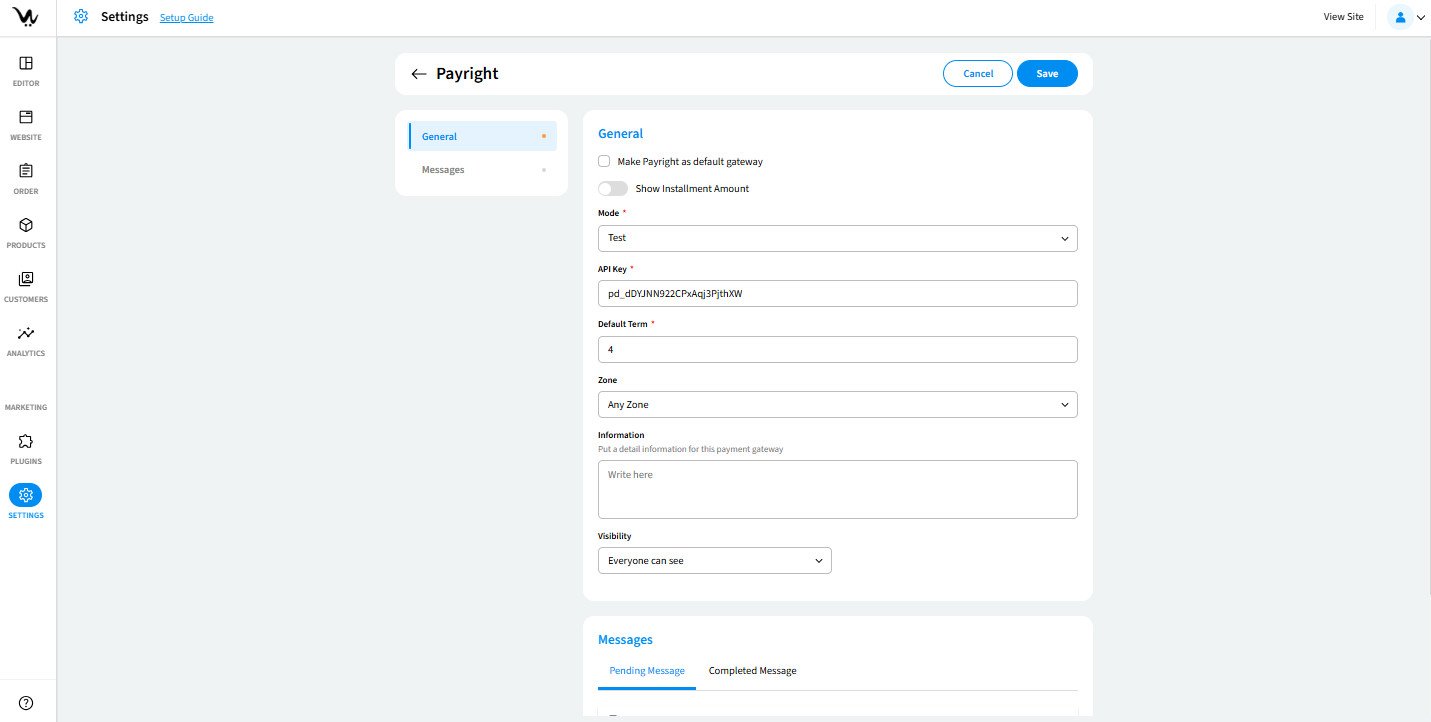
- Make default gateway: setting as Default Gateway allows you to set it as the default payment option. If you select default then this method will be selected initially in the checkout page.
- Show Installment Amount: Enable this option if you want to display installment breakdowns during checkout.
- Mode: Choose between Test and Live.
- API Key: Input valid API key provided by Payright.
- Default Term: Specify the number of installments (e.g., "4") in the Default Term field.
- Zone: In the Zone dropdown, select a specific zone or leave as Any Zone. Click Save. Only customers within the selected zone(s) will be able to use this payment method.
- Information: add internal or customer-facing notes such as bank account details, payment instructions, or terms.
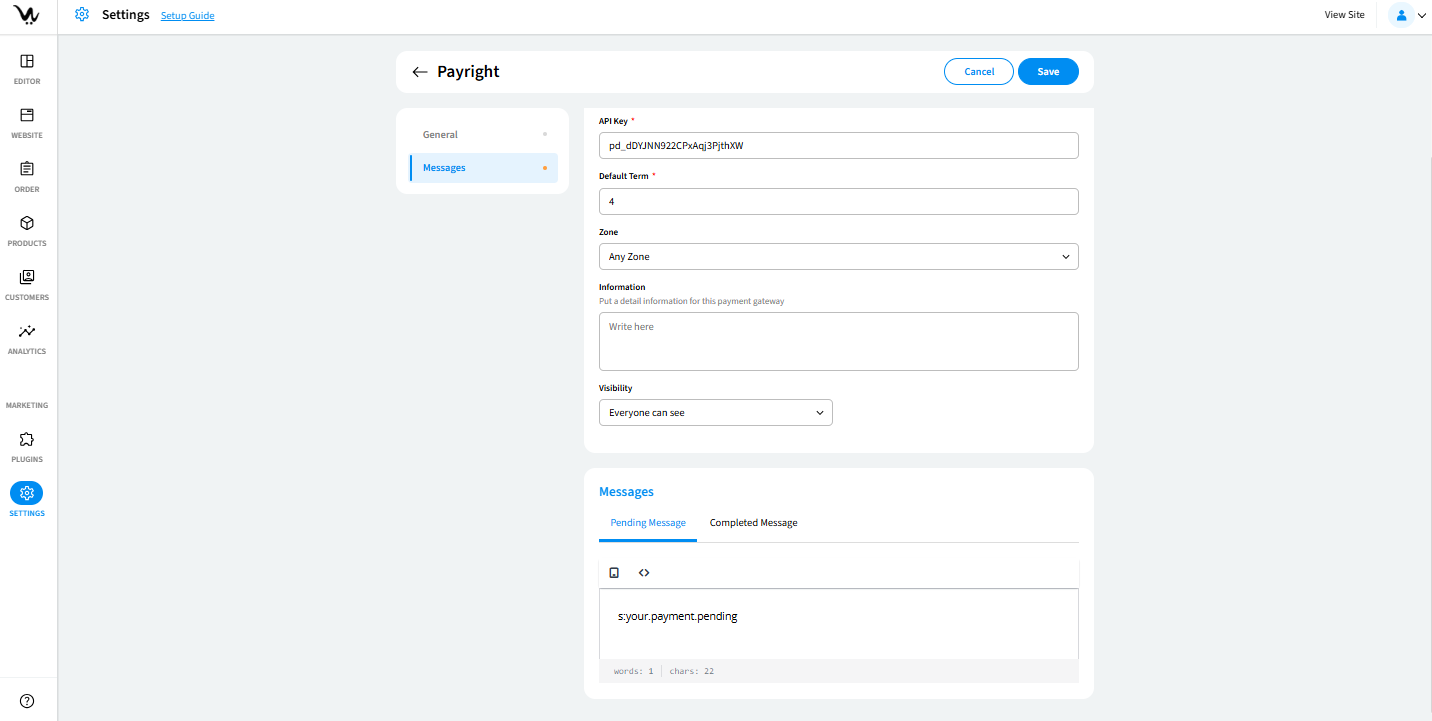
- Visibility: who can view and use the Bank Deposit method. Helps target the payment method to intended user groups.
Everyone can see
Only selected customers
Only users placing an order - Pending Payment Message: Customise the message shown while the payment is pending. Example: "Your payment is being processed. Please wait for confirmation."
- Completed Message: Customise the message shown while the payment is completed. Example: "Your payment has been processed successfully."
*Once you are done configuring you can check the payment process from the checkout page.
Troubleshooting Guide
- Ensure the API Key is valid and entered correctly.
- Verify Zone selection matches the customer’s location.
- Check if Visibility settings allow the user to view Payright.
- If Payright doesn’t show at checkout, ensure it is enabled and not in test mode for live payments.
- Make sure the Default Term is a valid number and not left blank.
- Save all changes after configuration.